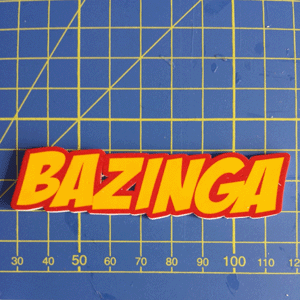
I do love Shrink Plastic! It's the geeky side of me for sure that is totally in love with making Marvel and DC Comic Necklaces in the shape of Wonder Woman's logo or Captain America's shield as a ring.
But for me to finally get to a stage that I am happy with my pieces there were many lessons learnt and so I thought I'd share them.
I don't think shrink plastic is cheap, so if you are using the paper via a printer I would advice running through a plain sheet of A4 (provided you have A4 and not letter shrink plastic) on quick draft mode to make sure that
a) you have all your pieces fitting perfectly on the sheet and not cut off the edges and
b) you've selected the right orientation - yes, I selected landscape when I wanted portrait!
Waste not want not!
Get as many images on your sheet as possible - that is without distorting or making too small.
Don't forget you can rotate images if needs be to use up any white/clear space on the plastic - that way you are getting the most out of each sheet.
If you are filling the page it is even more important to do the first suggestion.
Now we are happy with our images, we are ready to bake but be aware that images reduce to approximately 45% of the original size.
I would suggest before baking your images use a ruler to ensure you will be happy with a 55% reduction of the image and if you have space include a ruler on your first printout to use as a guide for remaining pages. If you don't have space, then make sure you have a ruler on your next print out.
Leave your print outs to dry overnight.
The instructions on the shrink plastic will probably say leave for 2 hours but I would suggest leaving overnight to ensure the ink has dried completely. What I found after two hours was how easy it was to smudge black right across the white wording when cutting around the images!
Be patient and let it dry.
Holes shrink too.
I find for necklaces my 1/8" punch leaves a nice size hole but is very small and therefore not only do I have to use a 5mm size jump ring I need to make sure my holes are rather close to the edge.
For keyrings, a nice sized 5/16" hole will work perfectly or a standard hole punch.
Ready for my favourite part - baking!
I place my images on a baking tray and cover the pieces with a sheet of baking paper. I do this as some pieces fold on themselves (especially if long and thin or rather large) and I find the sheet stops them doing it.
If I have large pieces I will only put one or two pieces in the oven at any one time - which I put on 160 (fan assisted) for 2 minutes.
One shrunk what you will notice is colour variations.
I make all my images fairly light on screen due to the fact that as the images are shrunk the colour intensifies.
As you can see from the 2 Elsa image on the left the colours have changed quite a lot and I probably could have gone even lighter with the pre-baked image.
So that's where I am with shrink plastic. The last step I have no advice and still struggle with.
I had read somewhere that Triple thick glaze gives the pieces a nice 'glass' effect - I can't get this to work. I can't get it smooth no matter what I try and have found the image goes even darker still!
I'm going to try clear nail varnish next see if that helps. If it does, I'll be sure to update this post.
Have you tried shrink plastic?


the kids have done those pre-bought shrink crafts before but i've never thought of doing it like this before. They look great and great tips to remember too. x
ReplyDeleteThanks Rebecca
Delete