 |
| Making Personalised Party Bag Name Tags |
With Max's birthday fast approaching, this year we decided to give him his first birthday party!
So obviously I can't let that day go by without a personalised touch, so I decided on creating personalised Party Bag Name Tags. The theme - Dinosaurs.
I purchased the images from vector stock, mainly because I wanted something unique and clear for printing. Once the images were downloaded I opened up my good old version of Photoshop and added the names to each child invited to the party.
As I fitted as many dinosaurs as I could on one sheet of Shrink Plastic I made the images lighter. This is a must as the image shrinks to approximately 50% of the current size and becomes darker as it does so. I use Shrinkies Inkjet paper - and as you can see it's not exactly cheap, hence fitting as much as possible on one sheet.
I left my print outs to dry overnight (how I have no idea, I'm soooooo impatient!). Then cut around them the following day and (all but one....) then put a hole somewhere near the top for the ball chain to go through. This must be done before baking as the plastic is too hard to put a hole through afterwards - I did try and it wasn't having any of it!
 |
| Name Tags ready for baking |
Once done I baked them for 2 minutes at Gas Mark 5 - I only tend to do a maximum of two at a time as I like to be able to get the whole set under my block to flatten - just in case when they curl they don't come back quite flat again.
Once solid and cold I then sprayed each dinosaur with lacquer and again left it overnight to dry through. I placed them back on baking paper and not tissue (after the first two decided to keep a bit of tissue on them!)
 |
| Cut, Baked and Lacquered Dinosaur Tags |
 |
| Shrink Plastic Dinosaur Tags |
 |
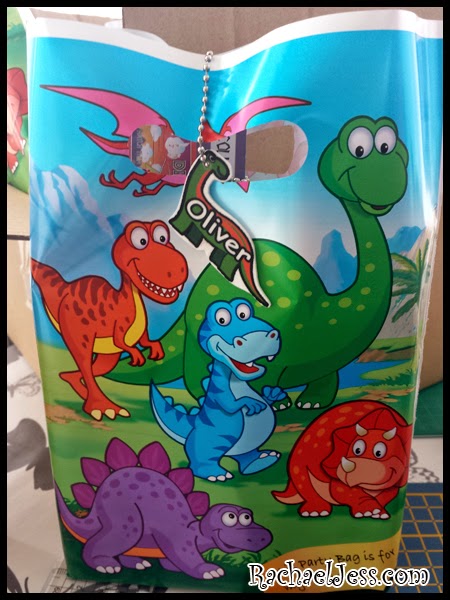
| Dinosaur Party Bag |
So what do you think? I'm rather wishing I had one now.

Very cute post, thanks for sharing! :)
ReplyDeletehttp://electricsunrise.blogspot.co.uk/
xoxoxoxox
Thank you Helen
DeleteExcellent work.
ReplyDelete